Lane Perception Restoration
Originally Published Oct 31, 2015
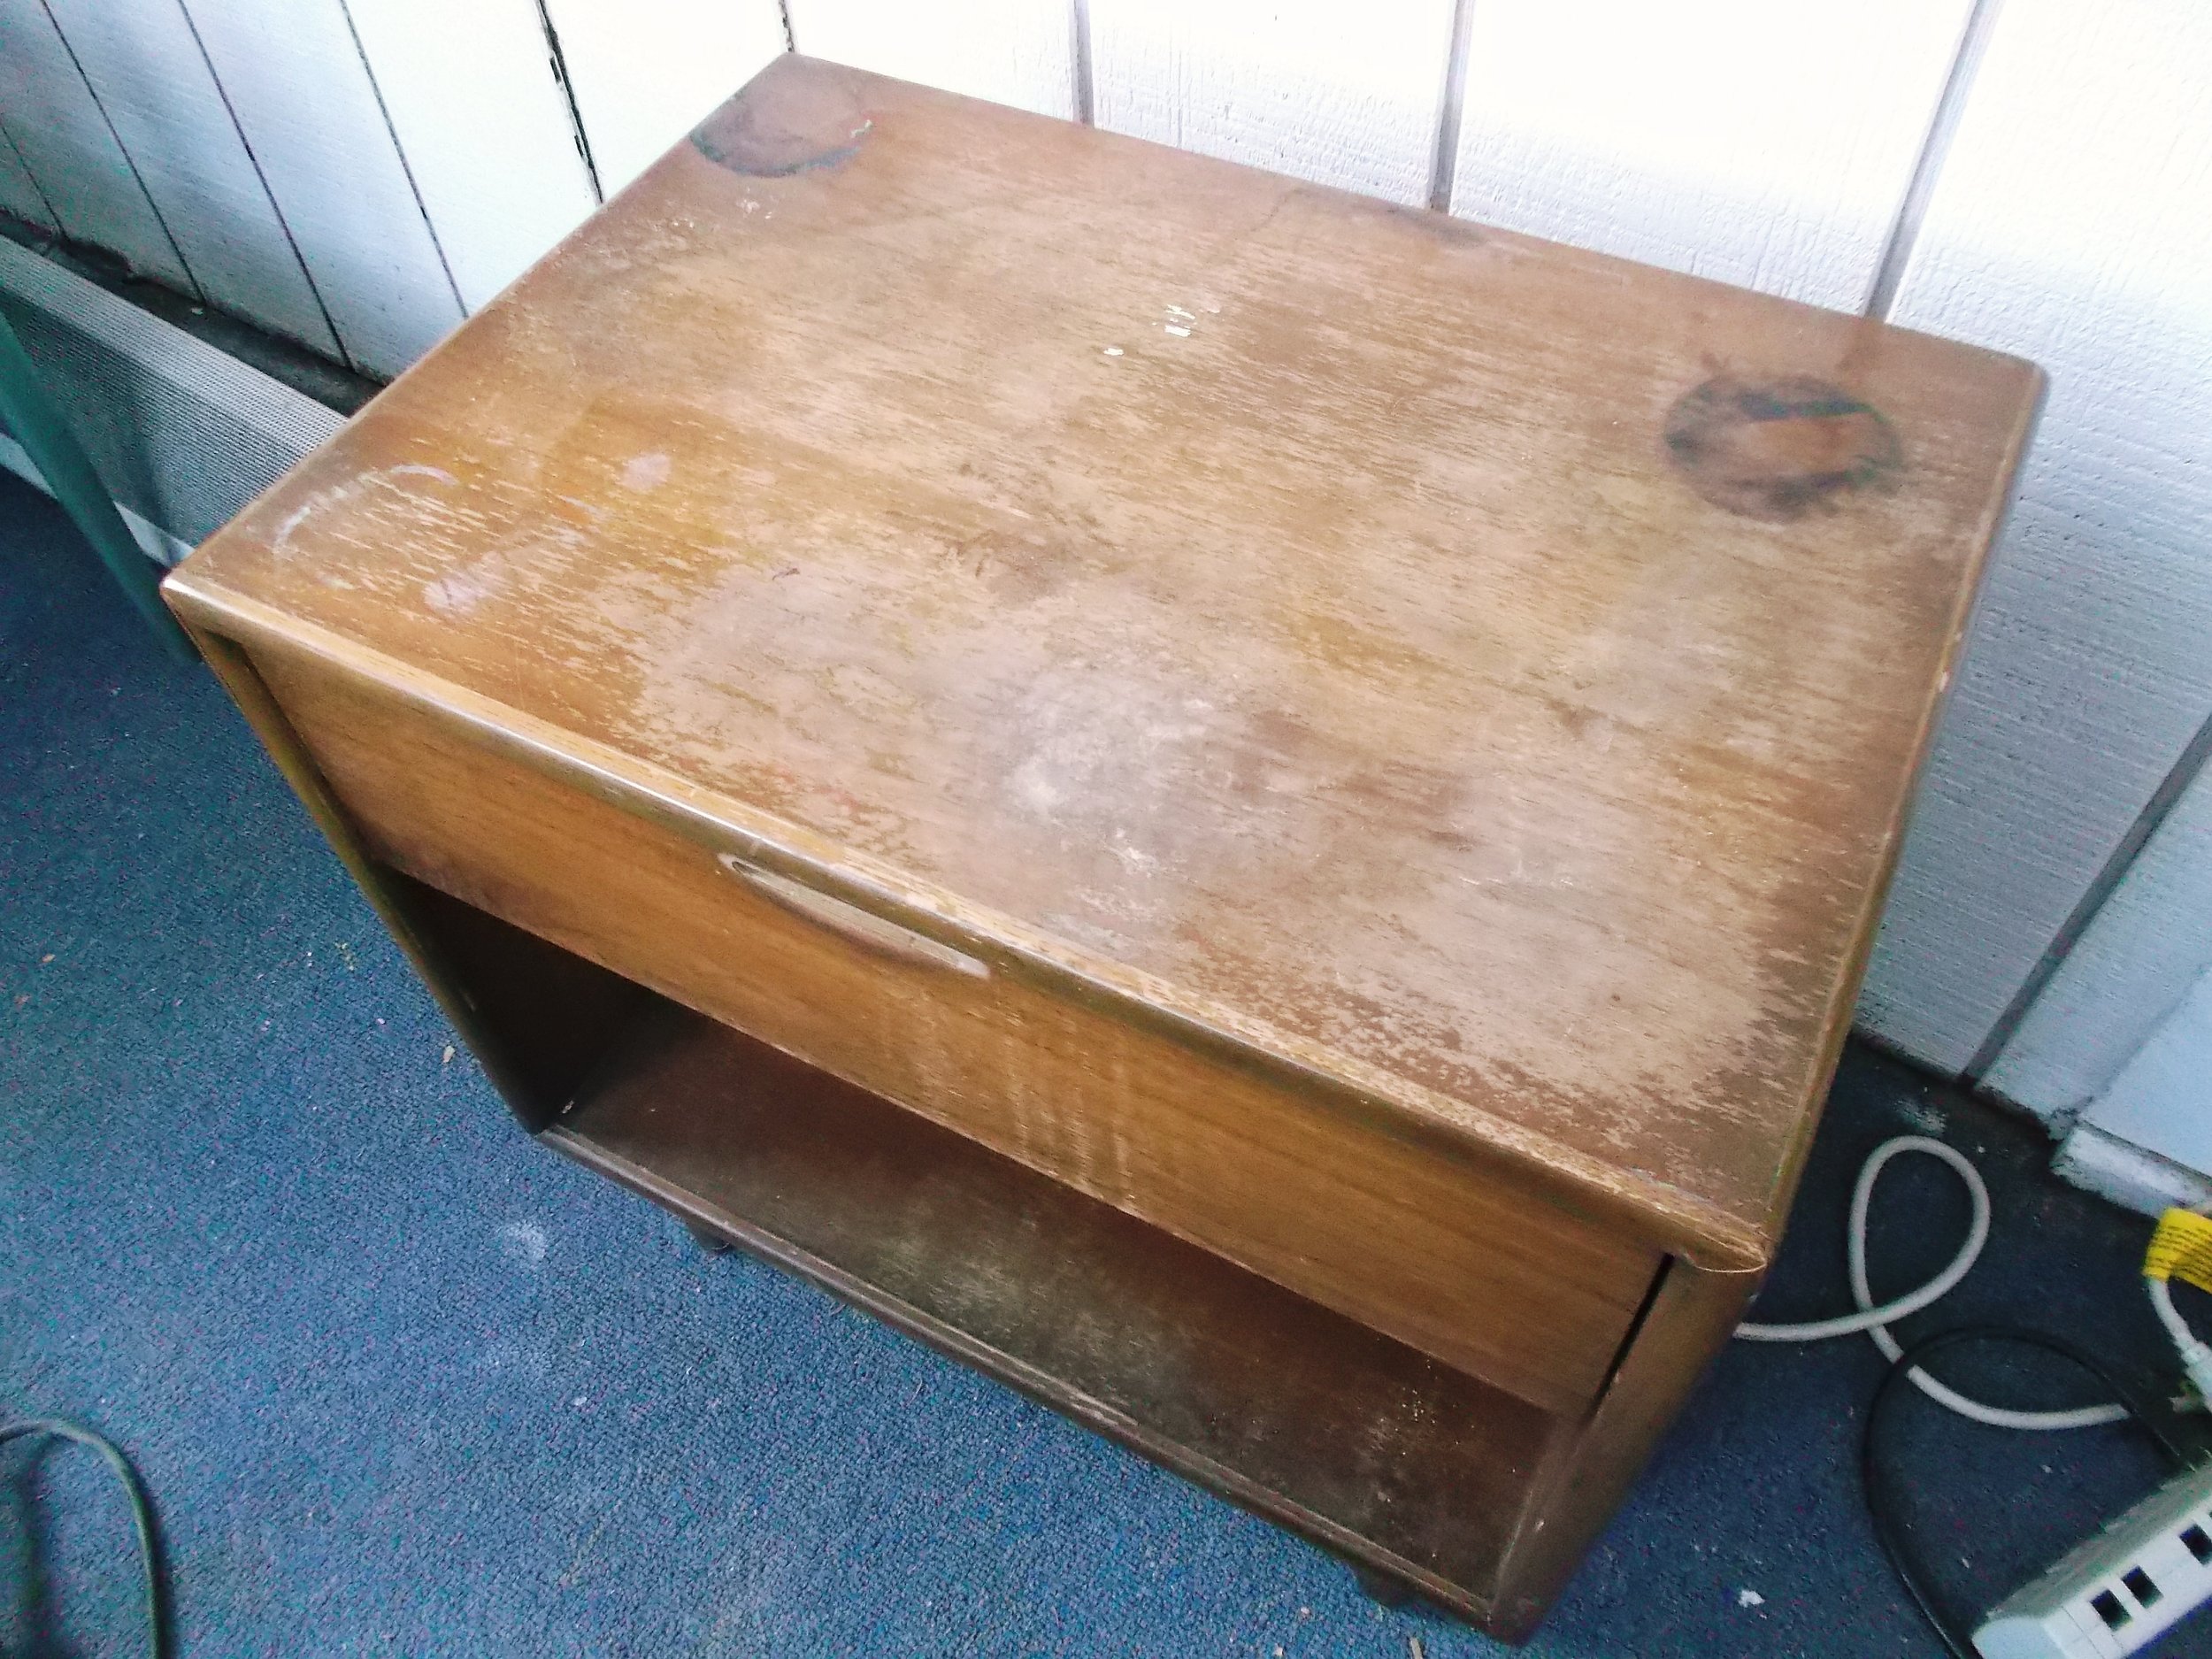
Here’s the story of an old Lane Perception nightstand that’s seen better days. It’s got flaking finish, black rings, loose trim, chipped veneer and a broken drawer pull. Can this poor table be brought back to life? Follow along and find out!
Stripping the Existing Finish
This is the least enjoyable step and is best left to your minions. I don’t like to get my hands dirty so I’m usually out on the links while the stripping is underway but my minions tell me that their preferred method of stripping the finish on this piece was to scrape it off. This can be done with a card scraper or even a utility knife blade. Scraping works particularly well when the original finish has already begun flaking off as it had on this table. Scraping is also a lot less messy than using a chemical stripper and is cheaper since you don’t have to buy stripper and the scraper can be used over and over and over again. This isn’t always the best method and often a chemical stripper is necessary.

Black Ring Removal
I first tried sanding this ring out but it was in there too deep so instead I used oxalic acid. Oxalic acid is usually sold in stores as wood bleach. I just wiped it on, let it sit for 5-10 minutes and then washed it off. It worked well as you can see in the pictures. There’s still a hint of the black lines left but they are running in the same direction as the grain so it shouldn’t be too noticeable once the finish goes on.

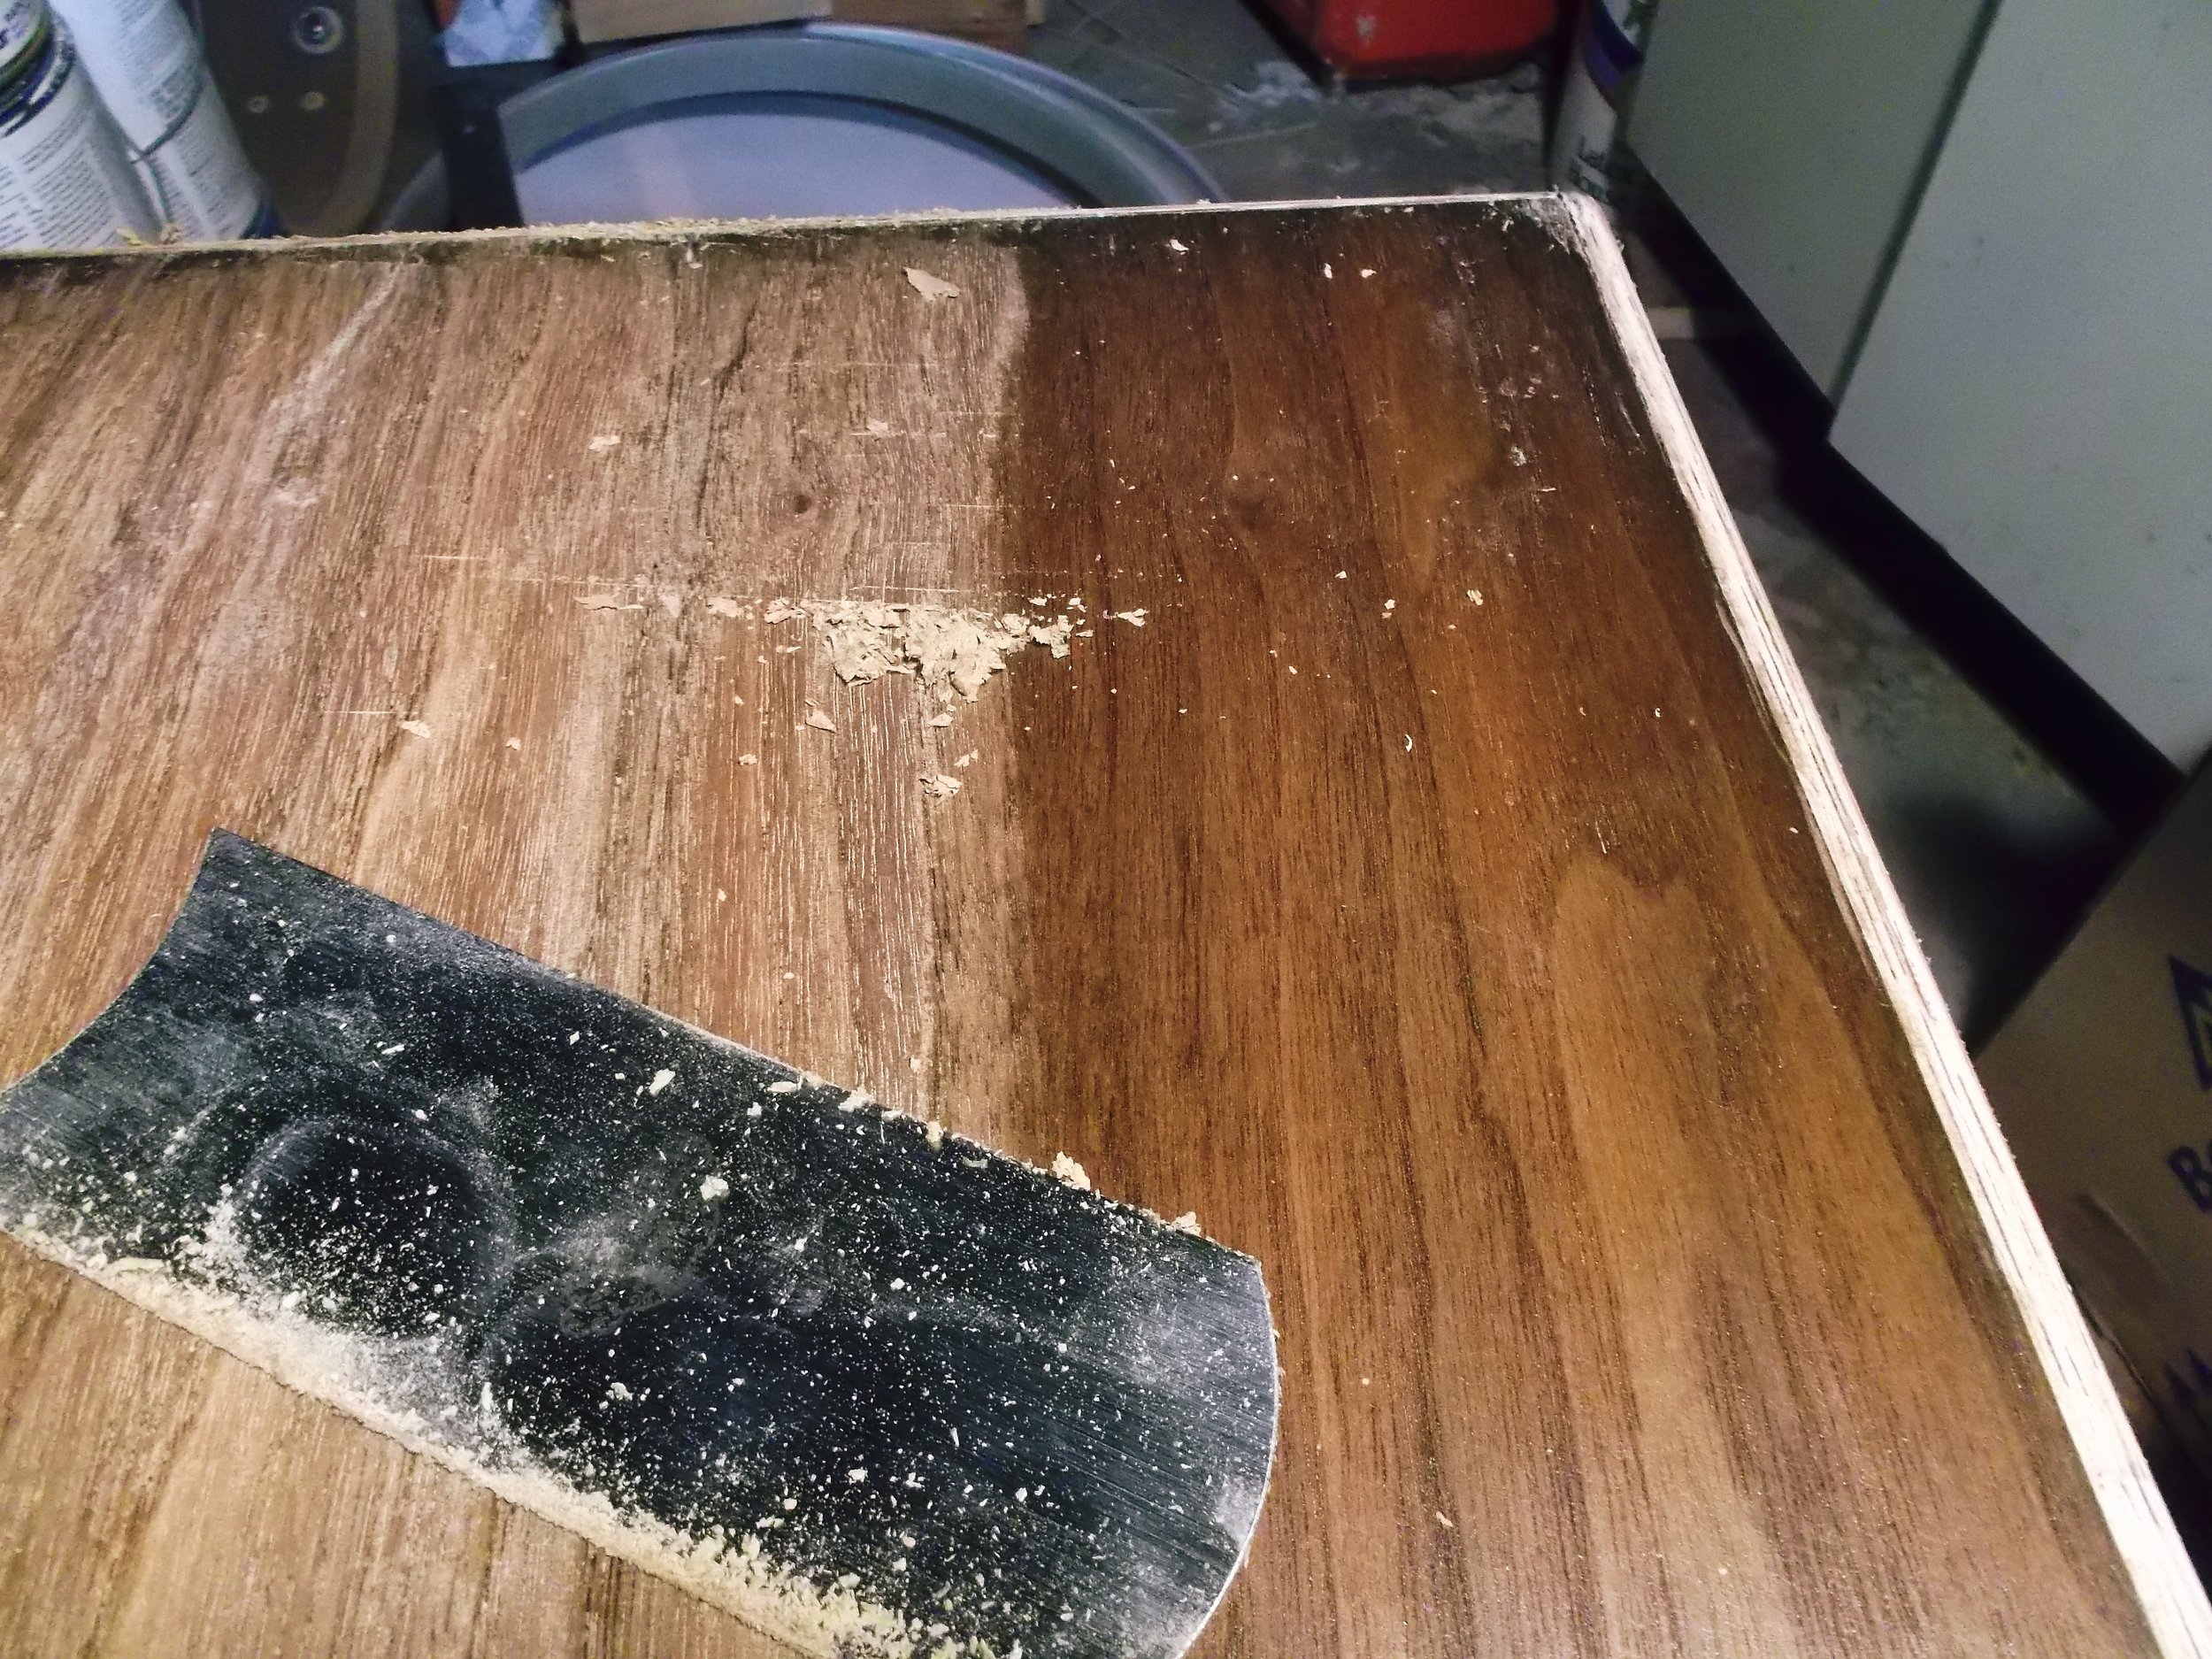
Veneer Repair
This table has a few veneer chips. Here’s a shot of one of them. My preferred method of veneer repair is to cut the damaged area to match the new veneer patch rather than try to cut the patch to match the damaged area. It just seems easier to get an accurate fit this way. I first cut a new piece of veneer that’s just slightly larger than the chip, hold the patch over the chipped area and trace around it with a knife. I then remove the patch and continue cutting along the line I traced until the excess material comes off and then glue the new piece in place. On the subject of glue, when gluing these in with wood glue I will sometimes color the glue with some dark brown dye or water based paint and when the colored glue squeezes out it will fill in any small voids around the patch.

Gluing Loose Trim
There was a loose piece of trim on the front that needed to be glued. I cleaned out the joint, shot some glue in and clamped it up. This trim piece appears to be made of ash wood. Ash appears often on Lane furniture. This one is a particularly nice piece of ash.

Pore Filling
This step is optional depending on the look you’re going for. This table has a walnut veneer and walnut is an open pore wood. If you’re going for a mirror smooth finish then the pores have to be filled before applying your topcoat otherwise the pores will be visible as small pits on the surface of the wood. If you’re going for a more natural look and don’t mind seeing the pores then you can skip this step. For this piece I am using Timbermate filler. This is a water based filler and is pretty easy to work with. The first step is to apply a sealer coat of shellac so that the wood isn’t stained by the filler. I then colored the filler with some dark brown dye and then added some water until it’s the consistency of toothpaste. I then spread it around the surface with an old credit card. Since it’s water based it dries quickly but it can be sped up by warming it with a hair dryer. After it’s dry I lightly sand the excess off with 220 grit paper until the only filler left is in the pores of the wood.
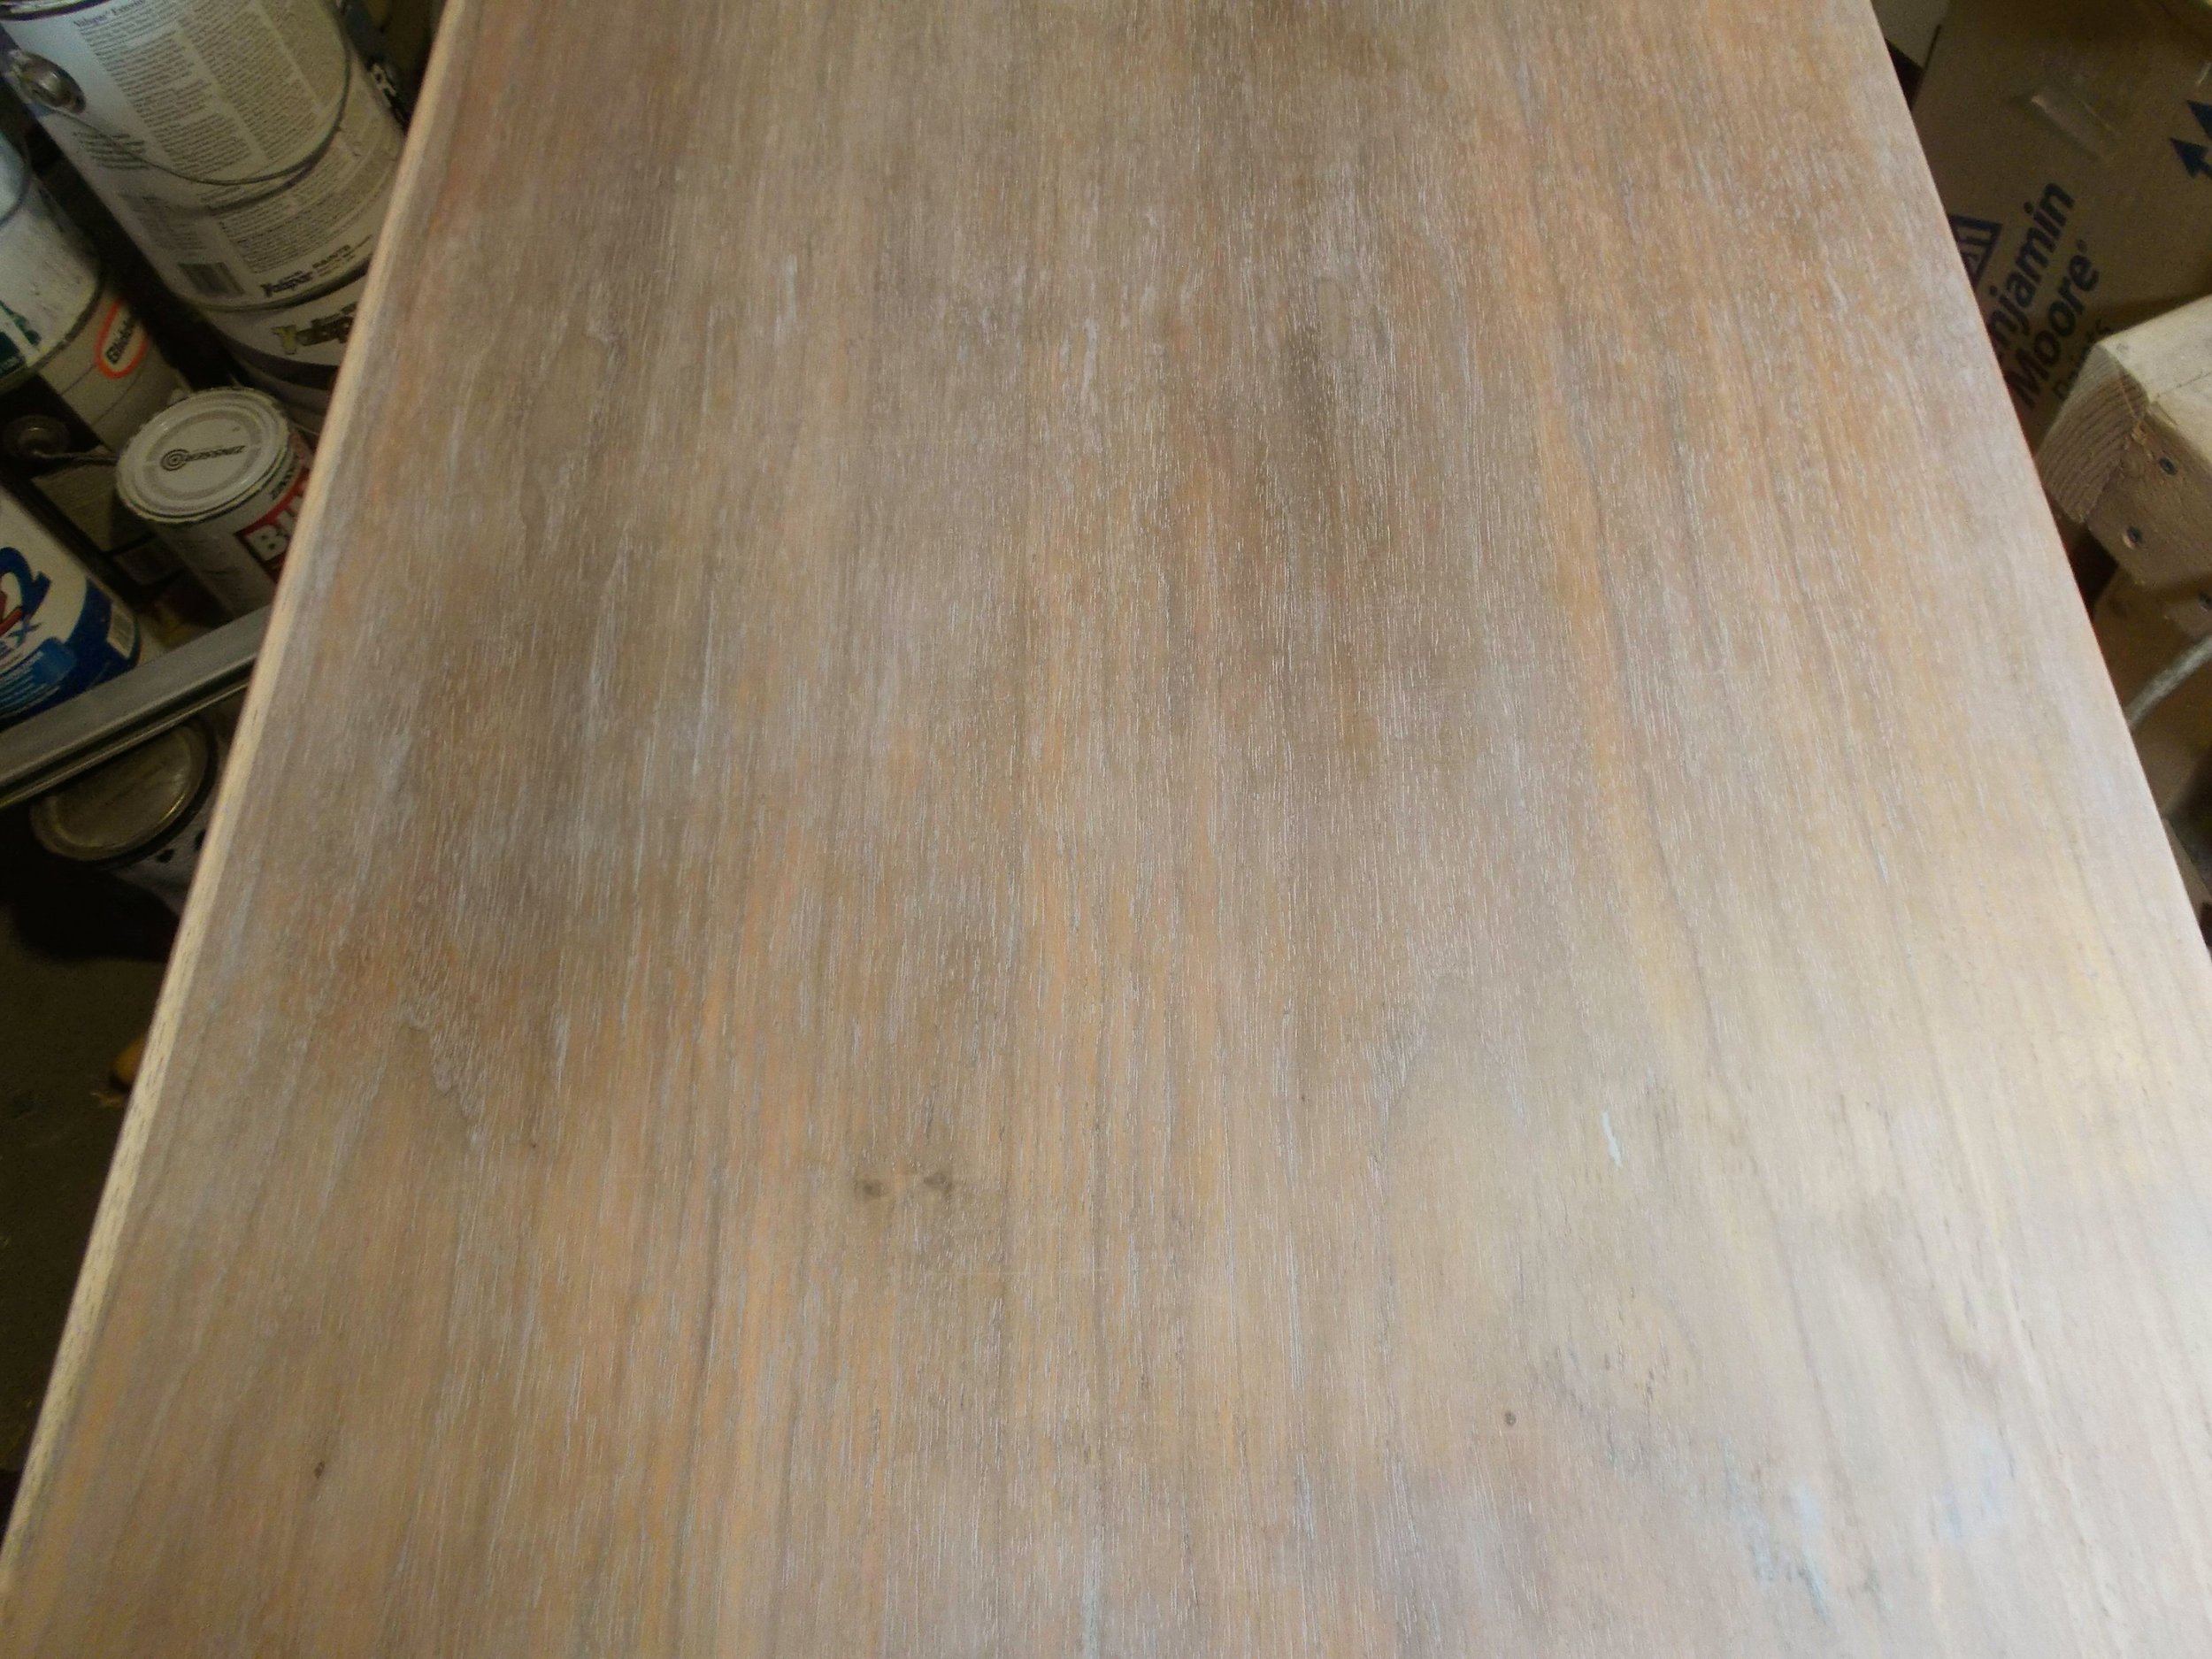
Here it is after the excess filler is sanded off. Doesn't look very attractive, does it? That will change once we get the finish on.

Stain and Topcoat
For this piece I’m using a walnut stain and a satin polyurethane topcoat. There’s not much to say about the staining process. I just wipe it on and then wipe it off after a few minutes. I do usually put a sealer coat of shellac or wood conditioner on before applying the stain. After applying the shellac I give it a light sanding with 320 grit. The shellac that’s left in the wood after sanding helps to even out absorption of the stain and helps prevent blotchiness. After the stain is dry I wipe on a few coats of the polyurethane.
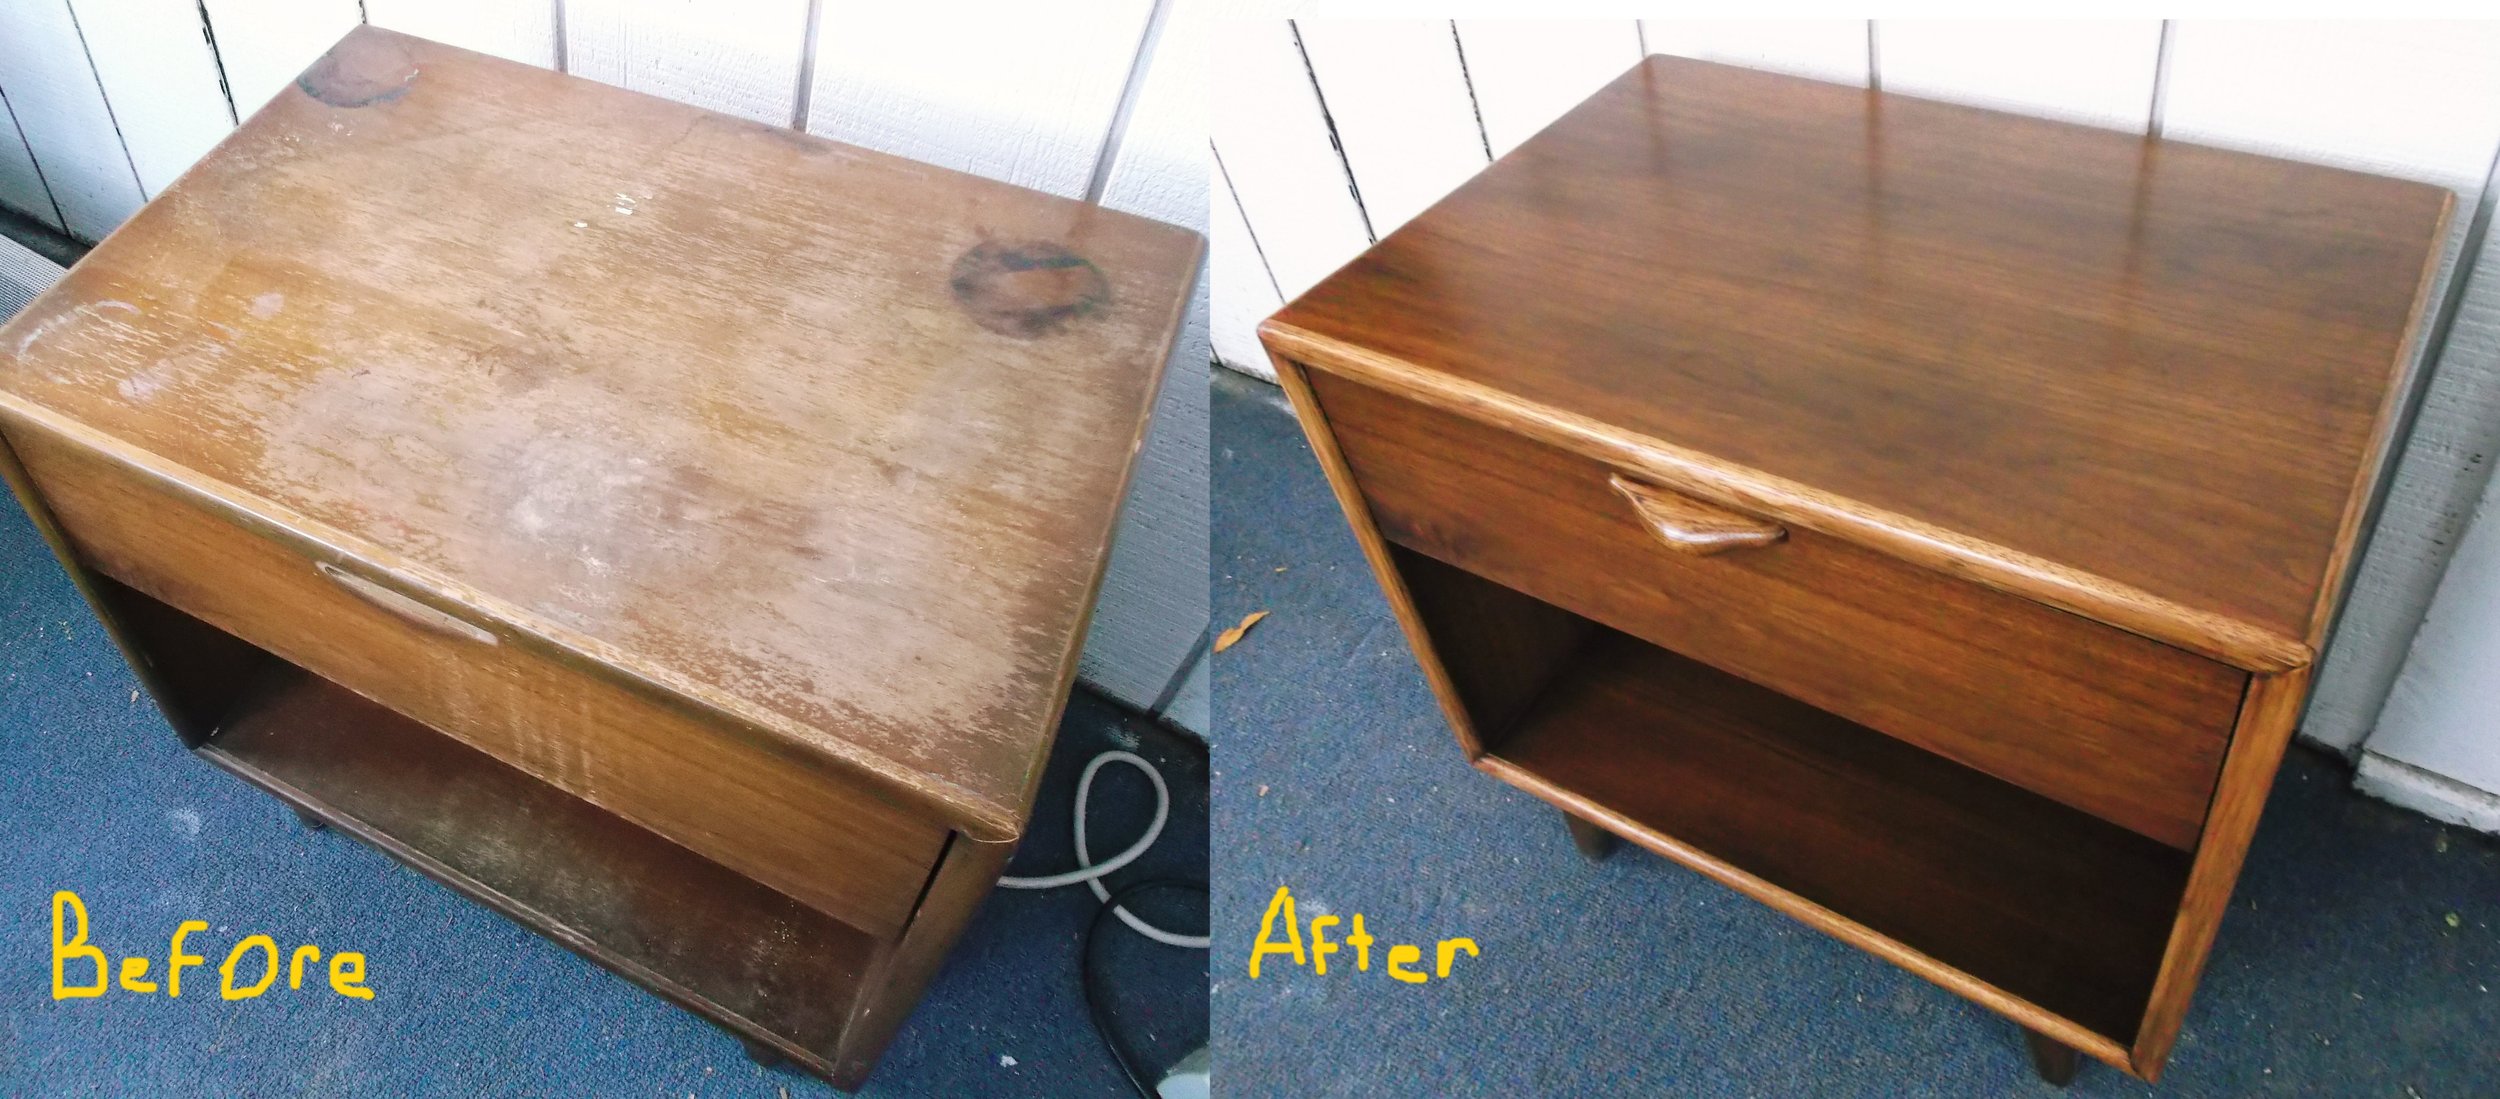
Done!
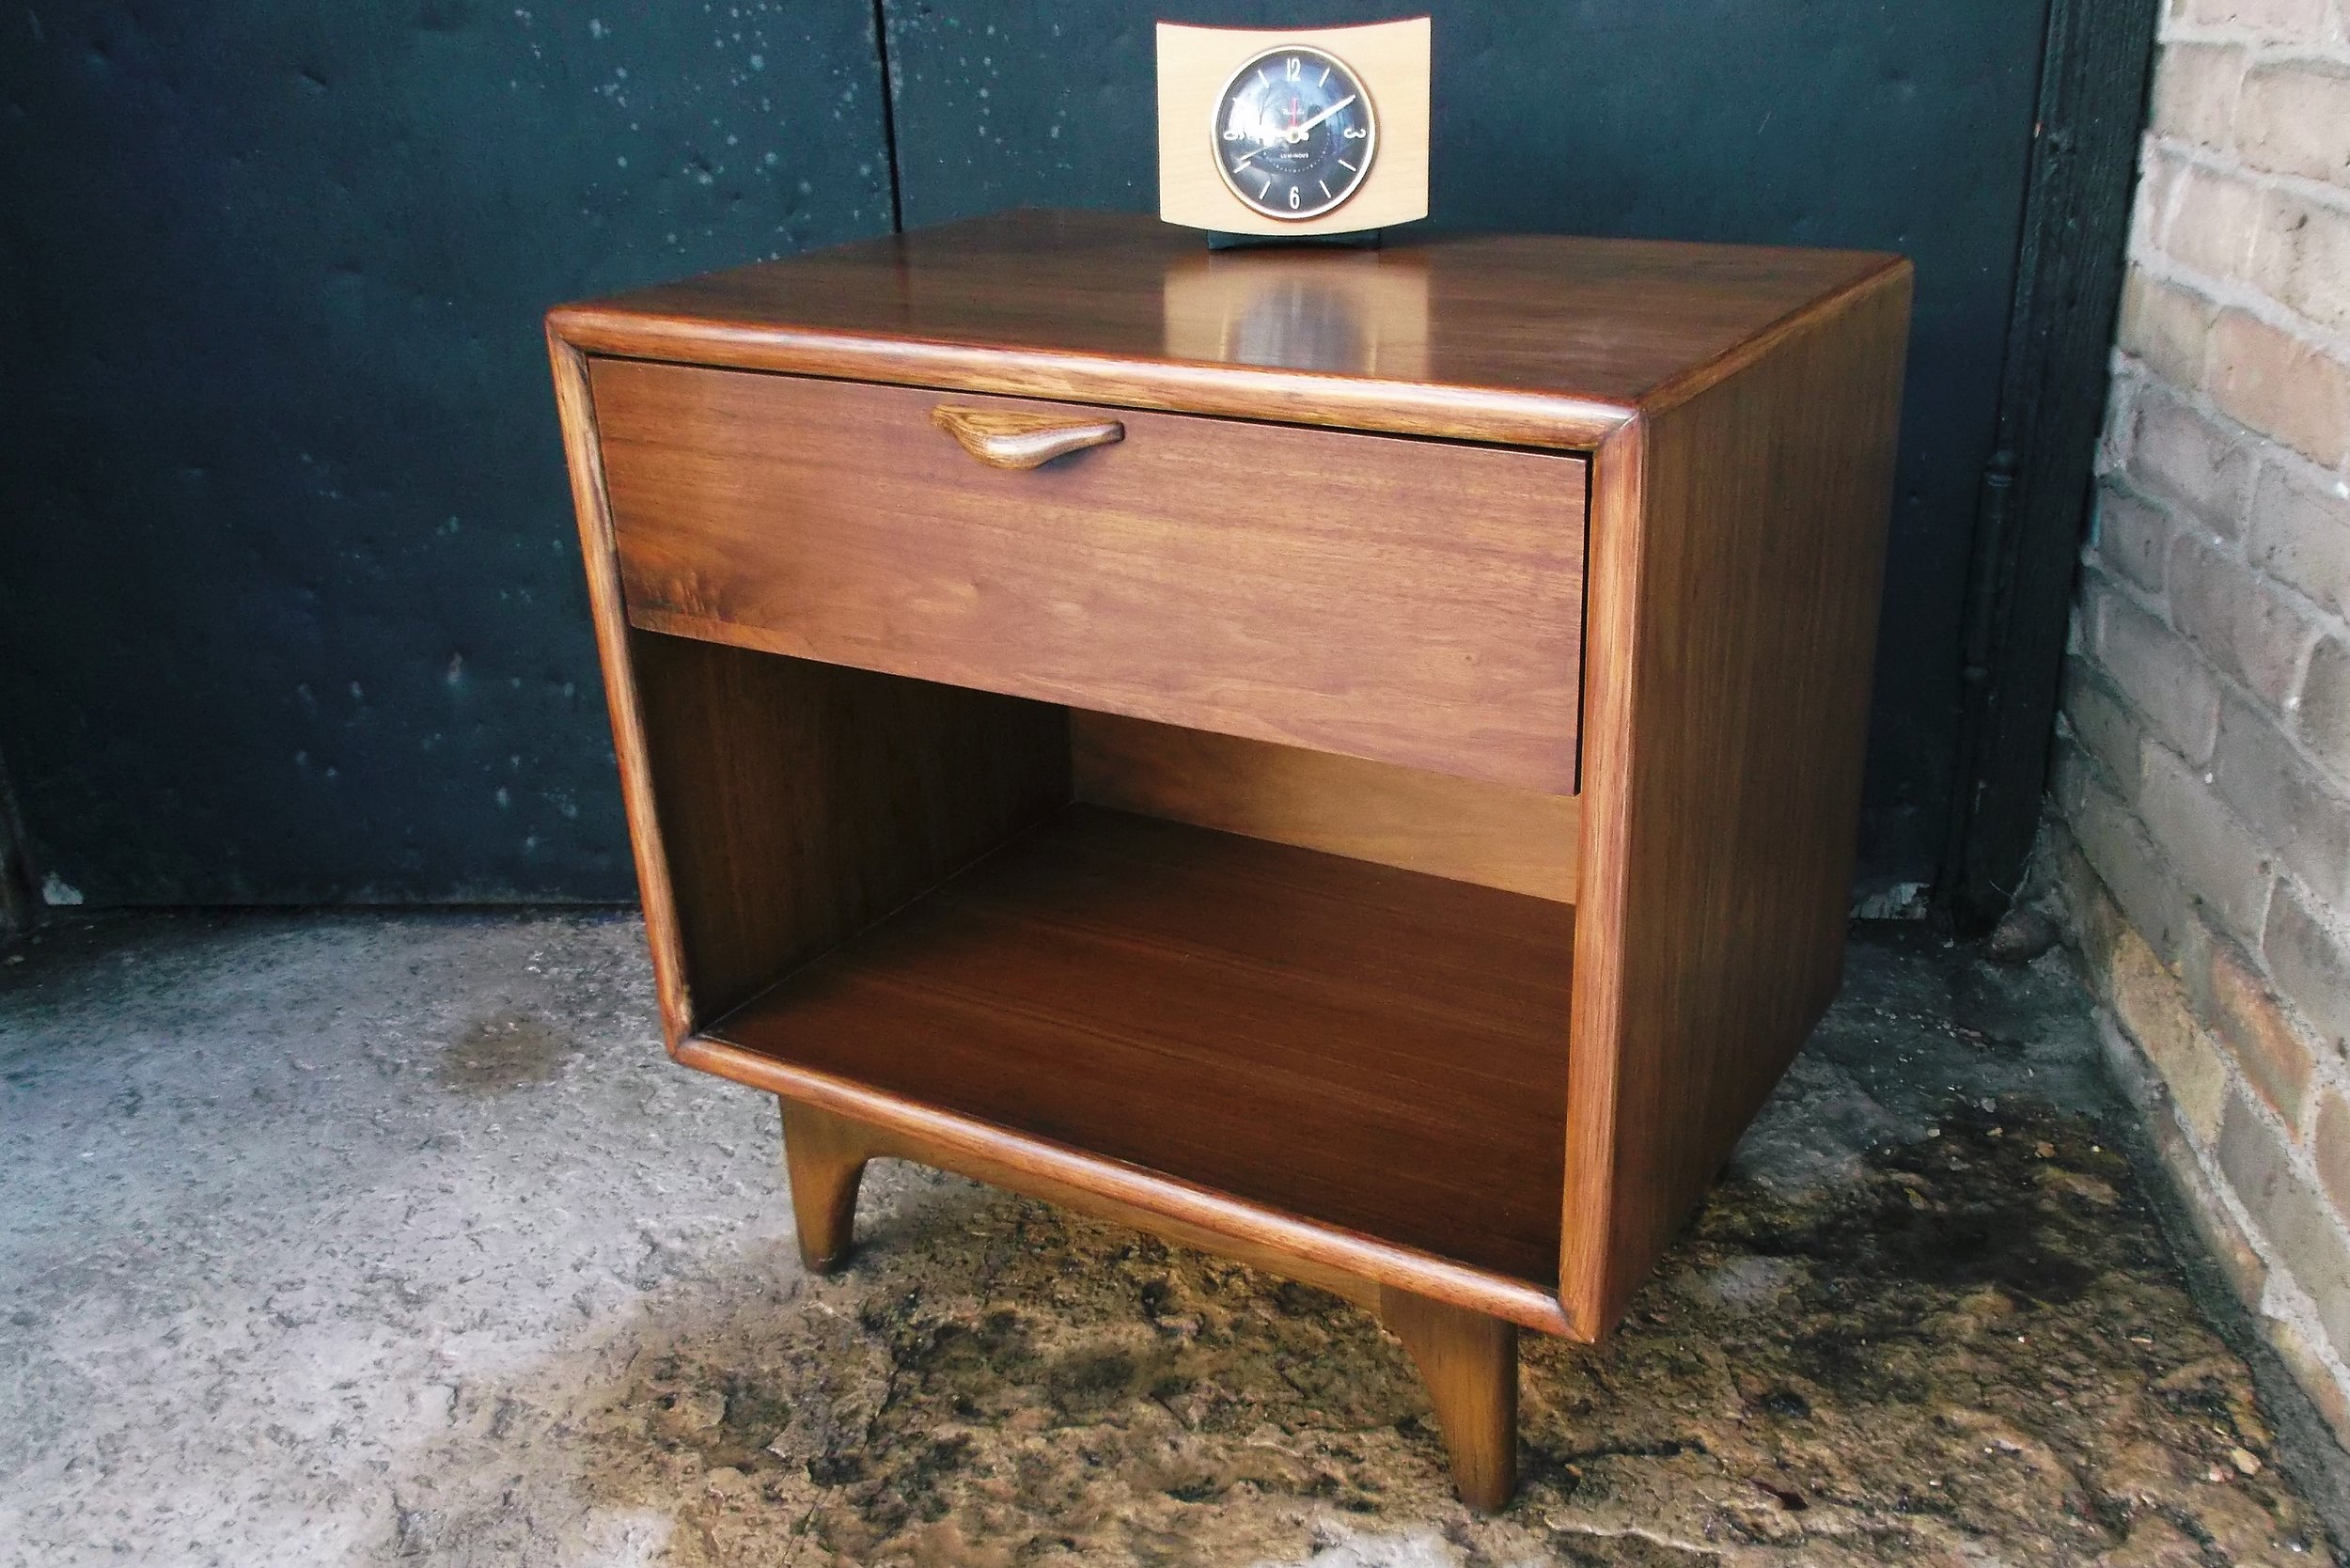
And here’s the finished product. I left out a few steps, including gluing the broken drawer pull back together, but maybe I’ll get to them in another restoration demo. I think it looks great. Another piece of furniture saved from the landfill!